
Line Stakeout on Nuwa

In Nuwa app, if you want to stake out a line, there are two forms.

First form: after creating a line to be staked out, stake out to the stakes on the line or the offset line according to the entered stakeout interval.

Click [Line] -> [Staking Line] to enter the staking line library. Click [Add] and we use two points to determine a line. Enter the Start Mileage, turn on Point On Line Staking, enter Stakeout Interval and Offset shown as below.


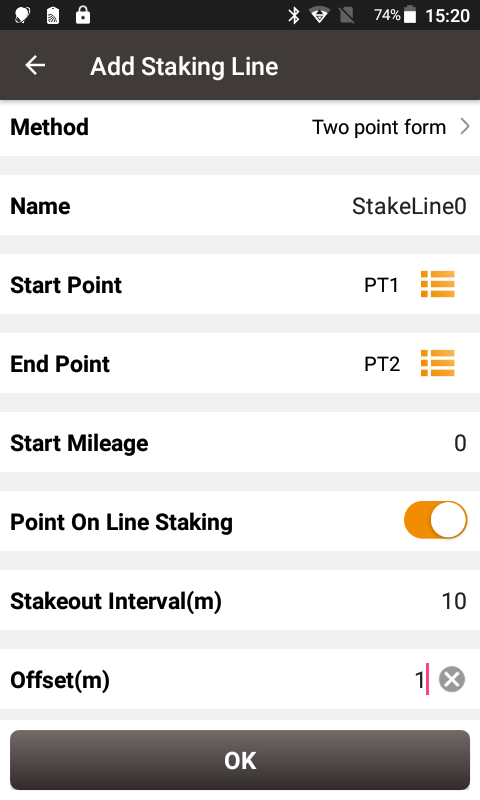
Start Mileage is a definition of the mileage given to the starting point of the line to determine the mileage value of other stakes on this line. Interval is used to determine how much distance to stake out a stake. For example, a stake is staked every 10m here, hence a line has a total length of 140.45m and a total of 16 stakes. Offset is the offset of the stake from the line. Of course, offset can be zero. When offset is 1, we consider that the stake is 1m to the right of the line forward direction.

Select this line for line stakeout. The first point is the stake point 1m to the right of the starting point. The second point is the stake point of 1m to the right of 10m on the line, and so on.


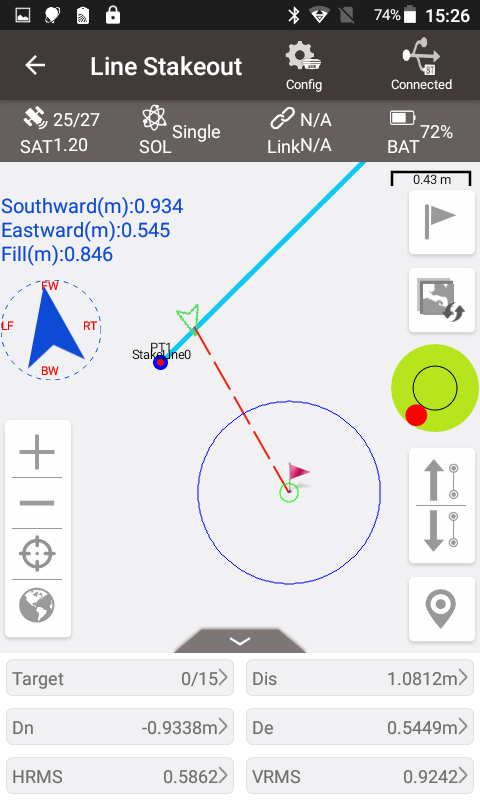
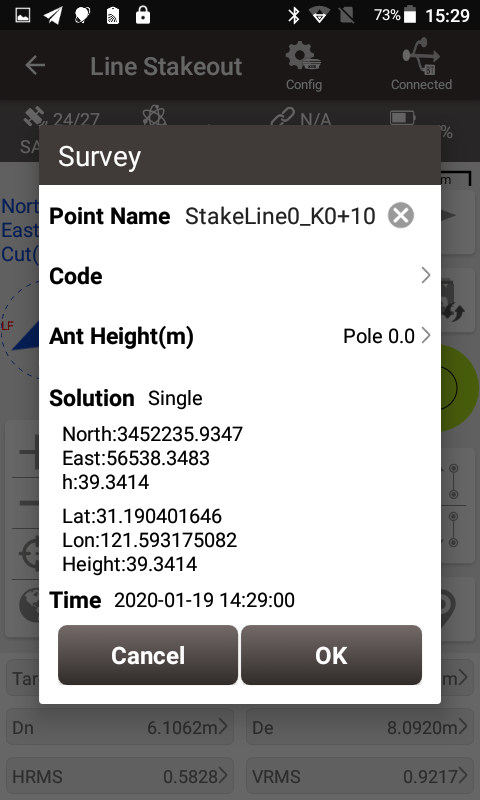
Using the up arrow and down arrow buttons, you can manually select the stakes to stake out. After stakeout points are collected, the software defaults the point name to the linename_stake mileage, for example the stake point at 10m on the line is named as StakeLine0_K0+10.


Second form: after creating a line to be staked, stake out to the vertical point on the line. The definition of the vertical point is: draw a vertical line to the line to be staked out passing the current position, and the point where the vertical line intersects with the line to be staked out is the vertical point.


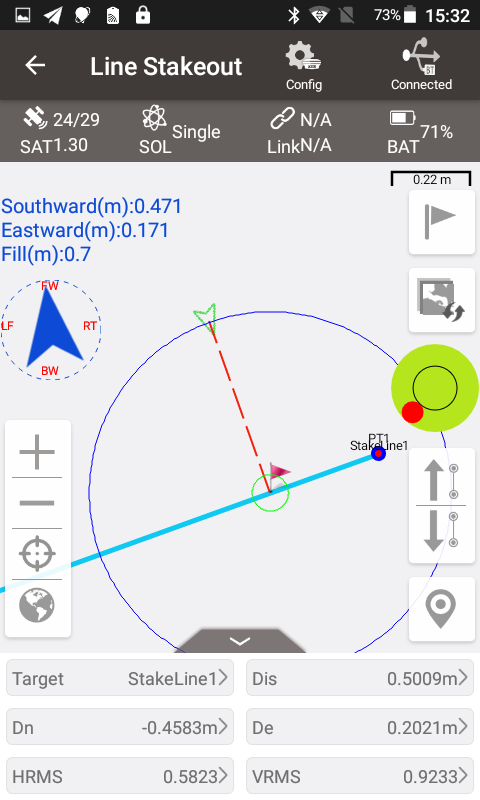
Obviously, as the current position changes, the vertical point will also move. This line staking method expresses that if you start from the current position, you can reach the position on the line to be staked as soon as possible.

Comments

  1. Would you explain how to insert a * .dxf file into a project and how to trace it directly from the screen

    ReplyDelete
    Replies
    1. Hi, sorry for the late reply. We are working on inserting the DXF file as a base map on the screen, which will be implemented in the next version. You can download the Nuwa app from Google Play or at our website: https://www.tersus-gnss.com/software/oscar-receiver. We will upload the next release after comprehensive tests.

      Delete
  2. Can you stake out a line directly from the dxf drawing?

    ReplyDelete

Post a Comment

Popular posts from this blog

Tersus Geomatics Office - Static Surveying - Data Processing

Tersus Geomatics Office is integrated office software to manage and process data for NeoRTK, the RTK survey receiver. It is laid out with visualized toolbars and logical icons to easily handle GNSS data processing, baseline processing and network adjustment, etc. It is the software set to import, update and analyze data effectively.  Watch the video to know how to do data processing after static surveying data collection with NeoRTK.  Learn more, click here .  Inquiry, click here . 

How to Use Oscar to Collect Static Data for A Given Length of Time

Usually, we need to collect static data for a given length of time, for example, 2 hours. In the past, the surveyor had to record the start time and keep an eye on the clock all the time. The function of setting the static collection duration in Oscar GNSS Receiver can solve this problem. When setting the static survey, the surveyor only needs to enter the duration time, then start it, and no more attention will be required. When the time is up, Oscar will automatically stop recording, with no fewer or more data. Now we show you how to set the Oscar static collection duration on the OLED display of Oscar. 1. Turn on the Oscar, press the Power ON/OFF button and Function (FN) button, and go to Mode Config -> Static. The default option of Static is OFF, and you can press the Function (FN) button to switch it to “Auto” or “Manual”. 2. Go to Duration to set the collection time, for example, 120 minutes. 3. Set other options, then choose “Confirm”, and it will start to collect st...

What is CORS network? How to connect to CORS network with external Bluetooth module and mobile phone?

A CORS is a Continuously Operating Reference Station. The CORS is an appealing way to do RTK due to its convenience and large coverage area. While Tersus Precis-BX305 currently does not support build-in NTRIP client feature. An alternative way to connect CORS network is employing external Bluetooth module and a cellphone. Here is a detailed procedure about how to connect to CORS Network with Precis-BX305 board.  Demonstration of connecting Precis BX305 to CORS Network Hardware & Software Requirement Precis-BX305 GNSS antenna GNSS antenna cable  External Bluetooth module Bluetooth cable Cell phone (android system) 5V DC charger Software required Ntrip client (free android apps)    Connect to CORS Network Please follow below steps.  Connect GNSS antenna to Precis-BX305. Connect external Bluetooth module to either COM1 or COM2 of the board Connect to power supplier and plug in/turn on the power Turn on the Bluetooth of the mobil...